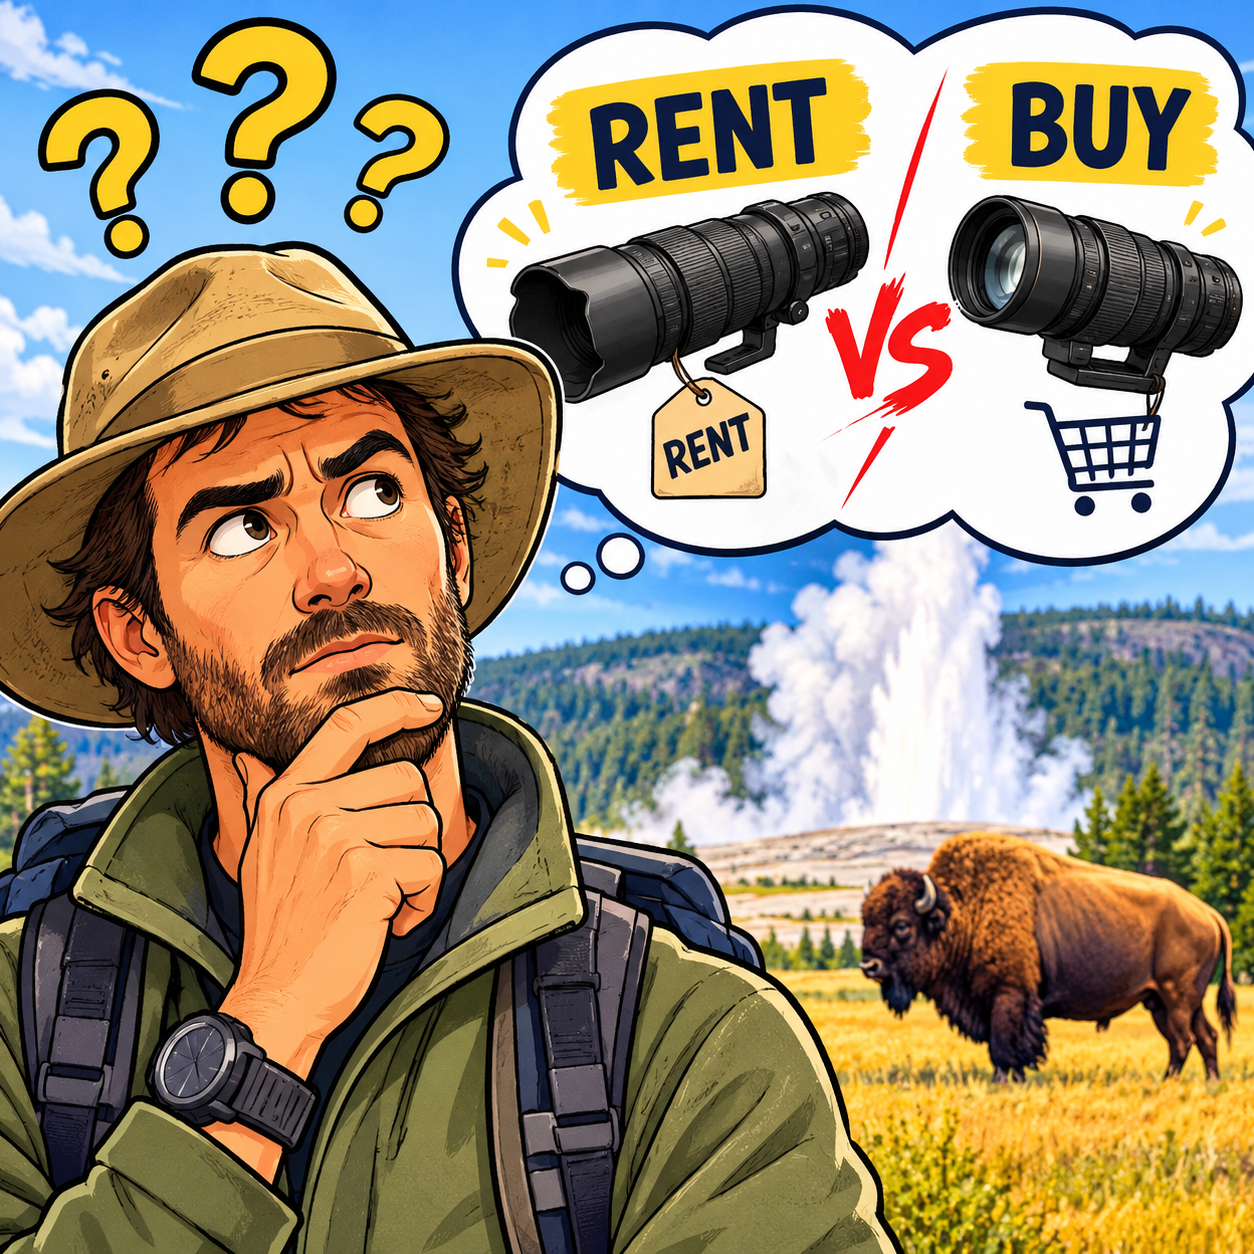
Should You Rent a Lens for Yellowstone?
A rental lens that reaches your door the evening before departure leaves you almost no room to discover that you struggle to hold it steady. You could spend the first wildlife sessions of your trip learning something you needed to know before leaving home.
I would rent a specialist long lens for a one-off Yellowstone wildlife trip, provided the booking includes time to practise and the financial risk is clear. I would buy a zoom after field use shows that I want to carry it close to home.
Whether you should rent a lens for Yellowstone depends first on your itinerary. A week built around early wildlife sessions gives a long lens plenty of work, while a family holiday with long hikes and occasional roadside stops gives you fewer chances to justify its cost and bulk.
Count the outings you can reasonably expect to devote to photography. If your plans depend on everyone else waiting while you search for wildlife, agree on that time before booking equipment. For practical ways to take photos without holding up your hiking group, plan your stops and keep the camera easy to reach.
Your current telephoto deserves a place in this decision too. You may get more pleasure from using familiar gear and including the animal’s surroundings, especially when wildlife photography shares the trip with other plans.
Once you know how much shooting time you have, you can choose a focal length that suits the pictures you hope to make.
Choose useful reach before choosing an expensive prime
Lenses in the 300 to 500mm range can work well for wildlife photographs in Yellowstone. A 500mm f/4 prime offers reach and a wide aperture, though a zoom covering 150 to 500mm can also be a useful choice.
The reach you need depends on the photographs you want. A distant wolf and a nearby large animal place very different demands on your kit, and your camera’s sensor size also changes the field of view you get from a given focal length.
A fast supertelephoto prime helps keep shutter speeds up in dim light. It also brings a fixed view and substantial carrying demands, so check the weight of the exact model together with any support you need.
A long zoom gives you room to adjust when an animal moves or when you want more of the setting. That flexibility can matter on a mixed trip, where changing lenses may be awkward and your next subject could be much closer.
Field use reveals handling problems that specifications leave unresolved. A lens with enough reach may still feel too heavy to carry comfortably or too slow to use in the light you expect.
Keep Yellowstone’s wildlife photography guidelines and ranger instructions central to your plans. Extra reach helps you photograph from a safe distance, while some encounters will remain too distant for the picture you hoped for.
Set your expectations before comparing prices, because even an expensive rental has limits on what it can bring within reach.
Compare the full rental quote with the cost of ownership
When renting a big lens for a wildlife trip, get a quote for your actual dates. Include the days before departure when you will test it, along with every travel day and the time needed to return it under the company’s terms.
An advertised daily rate tells you little about that total. Longer bookings may use different pricing, and the rental clock may follow rules you need to check before arranging delivery. For example, Lensrentals’ agreement explains its rental dates, shipping, and return terms; check the agreement for whichever provider you choose.
Build the quote from the lens charge, shipping, protection and any extra support or bag costs. Add applicable tax and check how late returns are charged, because those amounts can change which option you can afford.
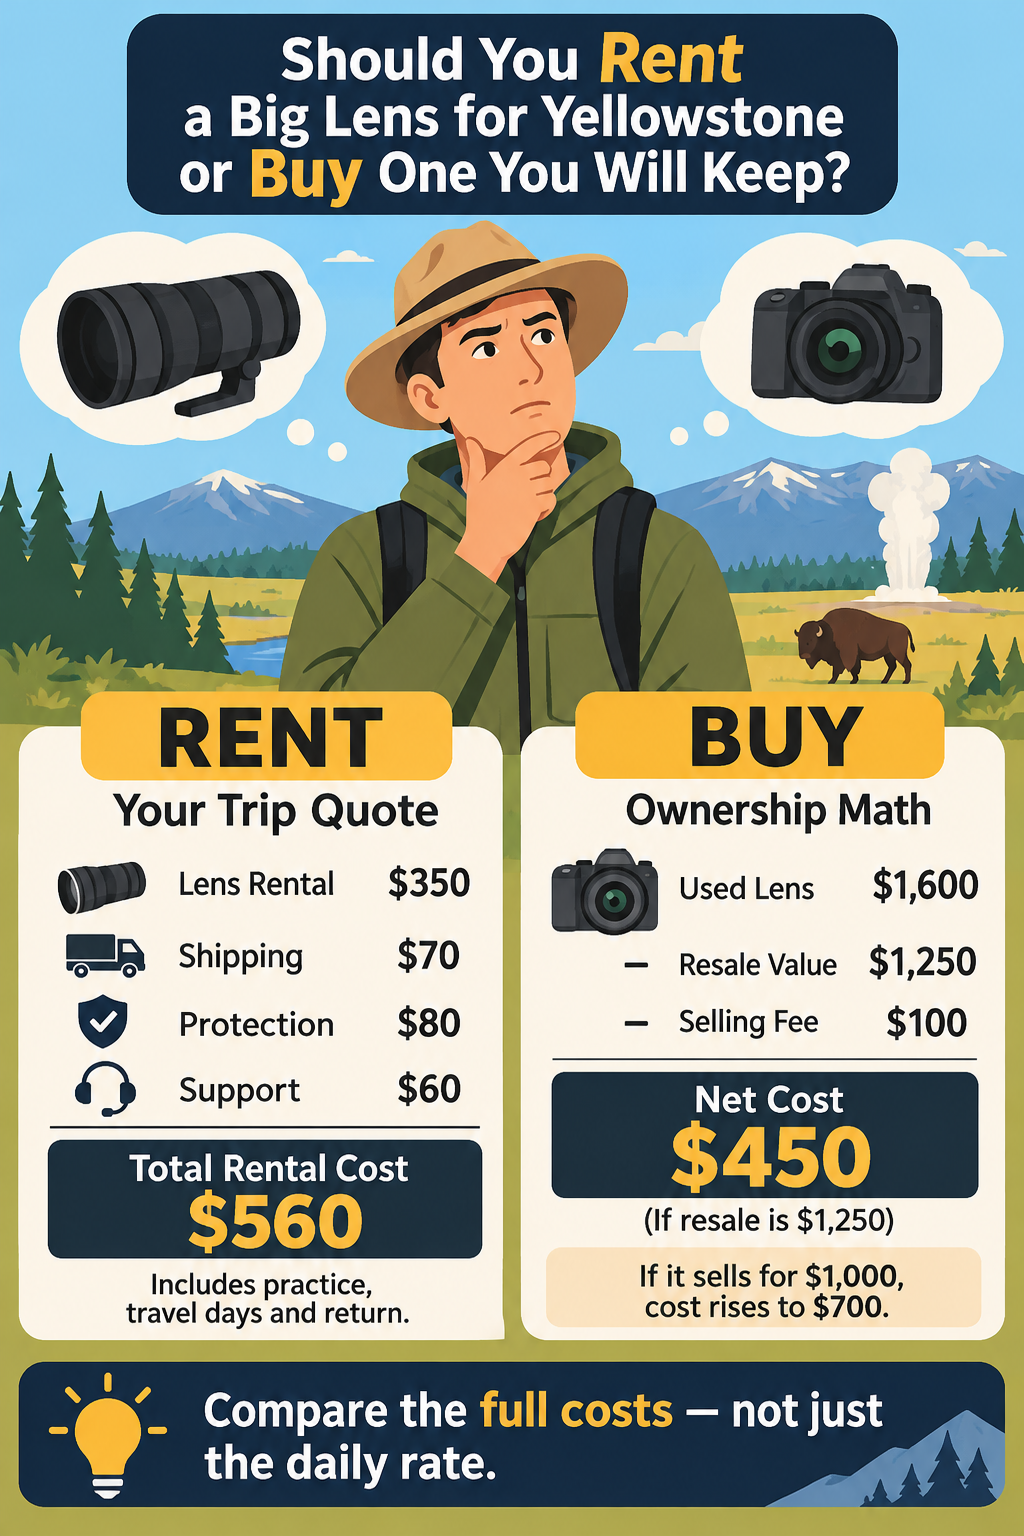
For a purely illustrative comparison, suppose a booking has $350 in lens rental, $70 in shipping, $80 in protection and $60 for support. That totals $560, with practice and travel days already included in the rental period.
Ownership needs its own calculation. Suppose a used zoom costs $1,600 including purchase costs, later sells for $1,250 and carries a $100 selling fee.
Your net ownership cost would be $450, assuming no repair bills or other expenses. If it sells for $1,000 instead, that cost rises to $700.
Resale brings uncertainty, and you need the cash available while you own the lens. Use completed sales for comparable copies when estimating what you might recover.
For a long stay, buying and reselling deserves serious thought. If you rent repeatedly, add up what you have already spent and compare it with the cost of a lens you have tested.
Rebooking the same zoom each season can become an expensive habit, especially once you know it suits you well enough to keep.
A rental that reveals a poor fit can save you a much larger purchase. Give that trial a place in your budget, then check how much you could owe if the equipment is damaged or lost.
Check what protection covers before you pay
“Insurance included” leaves too much unanswered when you are responsible for someone else’s expensive lens. Read the current agreement for the exact booking and find out whether the product is insurance or a damage waiver, since the terms and remedies can differ.
Check damage, theft, accidental loss and the amount you would owe on a claim. A plan that covers a dropped lens may exclude a lens stolen from a vehicle, so read any vehicle-security conditions closely before a road trip. You can compare rental protection plans and exclusions using Lensrentals as one example, then confirm the terms that apply to your own booking.
Ask how claims work and whether a deductible applies per item or per incident. Find out what happens if the lens is considered beyond repair, including how the replacement value is set.
If you plan to rely on your own policy, get written confirmation that it covers rented photographic equipment used on a personal holiday. A policy covering cameras you own may have different rules for rented property.
Credit-card benefits also need checking against their actual terms, even if you have used them for other kinds of rentals.
Delivery creates another kind of risk. Confirm whether someone must sign and choose an arrival date with room to deal with a delay or faulty equipment.
A shipping buffer and useful practice time may overlap, but both need space in the schedule.
Plan the return before leaving home. Check the carrier’s opening hours and the company’s deadline, then retain the receipt and tracking details.
A flight delay near the end of your trip can affect a tightly timed return, so leave room for that when you choose your booking dates.
After reading the contract, ask yourself whether you could afford the amount left at risk. If the answer is no, change the protection or the equipment choice before deciding where to book.
Where to rent a long lens for a trip
Start with a local camera shop if one has the lens you need. Collection can remove shipping costs and give you a chance to check the equipment with staff present.
Ask about opening hours, because a convenient collection can still lead to an awkward return.
An online rental service is worth comparing when local stock is limited. Look at availability for your dates and the full delivered cost, then read the current terms before booking.
Choose a company that can get the right equipment into your hands early enough to test it and offers support you can reach if something goes wrong. Leave enough time in the booking to find out how that lens works with your camera and the way you shoot.
Give the lens a real rehearsal
Mount the rental lens and check autofocus as soon as it arrives. Then schedule a proper outing with the camera body and packed bag you will use in Yellowstone.
Begin at home by confirming mount compatibility and any adapter requirements. Check that autofocus and stabilisation behave as expected.
Locate the focus limiter and any custom buttons, then consult the manual for controls you do not recognise. You want to find those controls easily while watching an animal through the viewfinder.
Check the tripod collar and support setup if you will use them. Make sure the packed lens fits your bag safely and, if you are flying, that you can meet your airline’s current cabin-baggage limits.
Next, photograph moving subjects somewhere easy to revisit. Birds at a local pond can reveal how quickly you find a subject at the long end.
Practise pulling back on the zoom to find the subject again, then tracking as it changes direction.
Walk with the full kit for a length of time that resembles an outing you have planned. Take the camera out repeatedly, because access matters when a subject appears briefly, and notice how your shoulders feel after the return walk.
Review the files at a useful size that evening. Look for patterns in missed focus or motion blur, then repeat the exercise after changing one setting or technique. If focus keeps landing on nearby branches, troubleshoot autofocus before your trip.
This gives you a chance to separate a handling problem from a faulty lens while there is still time to get help.
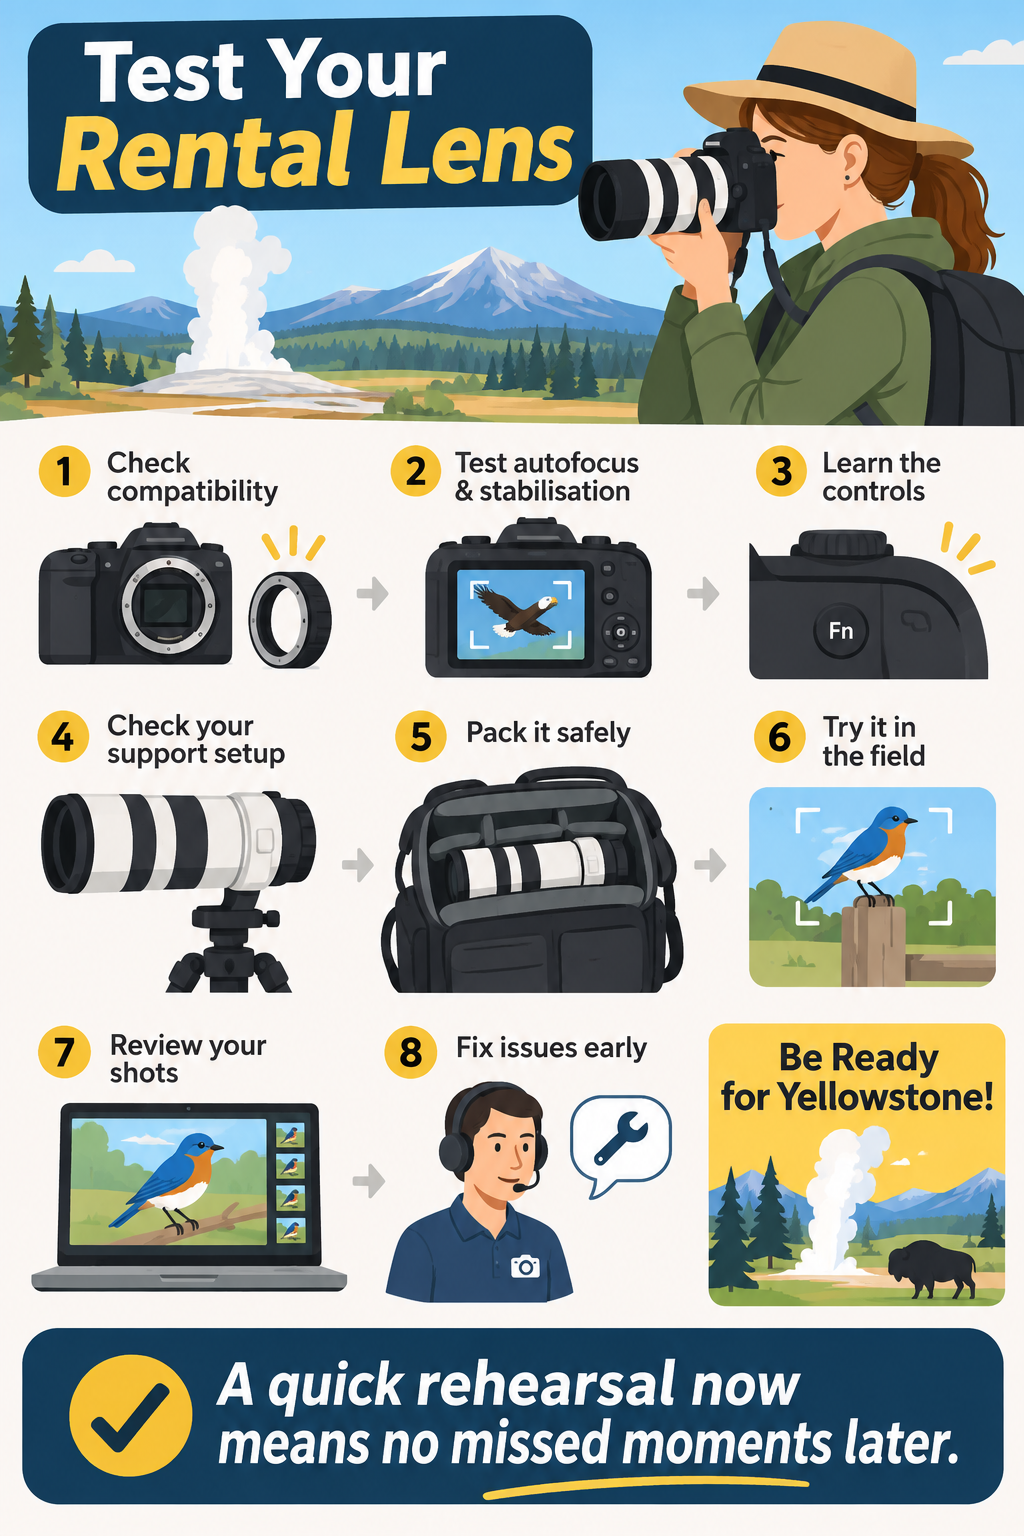
If the rehearsal goes badly, contact the rental company while there is still time to act. Learning that you need a lighter lens can make the booking worthwhile, especially when you are also considering a purchase.
Decide whether you will carry the lens after Yellowstone
If you are worried you will regret buying an expensive lens, name the places where you would use it during an ordinary month. Be specific enough that you could put an outing in your calendar.
A nearby wetland you already visit gives you a solid reason to consider buying. A trial outing shows what the added weight does to that familiar walk and whether you still enjoy it with the lens along. Aim for a camera kit you can carry comfortably throughout the outings you actually enjoy.
Renting competing options can help you understand your preferences. Carrying each lens and making pictures with it gives you a firmer basis for spending the money.
Pay attention when a lens keeps staying home. You may enjoy using it beside the car while finding it burdensome on a trail.
That can still justify ownership if roadside wildlife is what you regularly photograph, so judge it against your real outings.
Be careful about using distant landscapes to justify the purchase. Haze and mirage effects can limit distant detail with a supertelephoto, even when your technique is sound.
A long lens can make lovely landscape photographs, though clear air across a valley remains beyond your control. Test that use locally before counting it as a reason the lens will earn its keep.
Rental-to-purchase credit deserves the same care. Compare the final price with current new and used options, including the warranty and condition.
Check which fees count towards the credit, since shipping or protection may be excluded. Those costs can make the offer less useful than it first appears.
Money already spent on the trial can pressure you to keep a lens you would otherwise return. Set your purchase limit before testing it, then use what you learn during the rehearsal to make the final choice.
Choose equipment you have tested
Rent the specialist lens when Yellowstone creates an unusual need and you have enough dedicated photography time to use it. Book early enough to rehearse, and make sure the remaining financial risk is an amount you can accept.
Buy the zoom when field testing shows that its reach and handling suit recurring outings. Put weight on the days you will use it after Yellowstone, and include a cautious resale estimate if you expect to sell it later.
Take your existing kit when wildlife photography has a smaller place in the holiday or the extra equipment would make your planned walks harder. You can choose compositions that suit its reach and leave some distant encounters as memories.
Resolve any failed compatibility or coverage check before committing. Handling trouble also deserves another practice session while you still have time to change your booking.
Pack the lens you have proved you can use, so that when wildlife appears, you can give your attention to its movement and the light with your hands already familiar with the camera.