
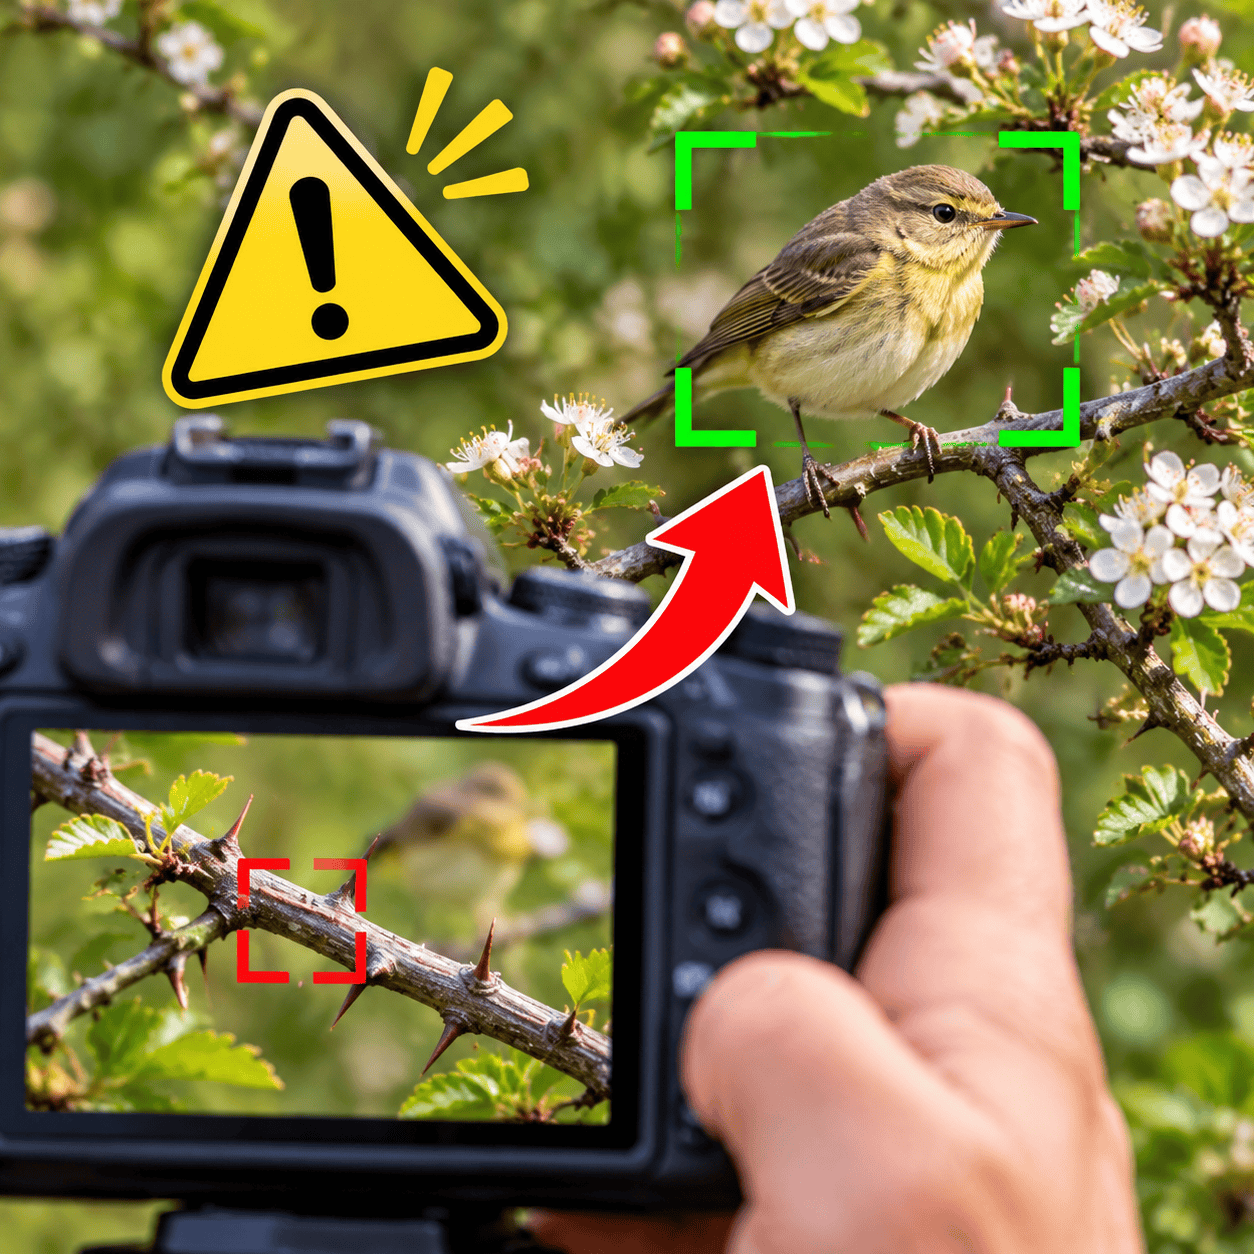
You find a small warbler sitting in a hawthorn, the camera draws its neat little box, and you fire a burst that feels perfect in the viewfinder. Then at home you zoom in, and every thorn on the branch in front of it is sharp while the bird is a soft brown shape just behind.
If that keeps happening, you have probably started to wonder whether the bird detection you paid for actually works. It does work, and yet it also has a quiet fallback behaviour that explains nearly every one of those shots.
Once you see why autofocus grabs a nearby twig, these five bird autofocus mistakes are easier to spot and fix.
I will also come back later to the most annoying case of all, where the camera puts a box right on the eye and the eye still comes out soft, because that one needs a different kind of fix.
Sharp twigs, soft bird, and why it keeps happening
A Nikon Z8 shooter on a bird photography forum laid out the mechanics more clearly than any manual I have read, and his account matches what I see in the field.
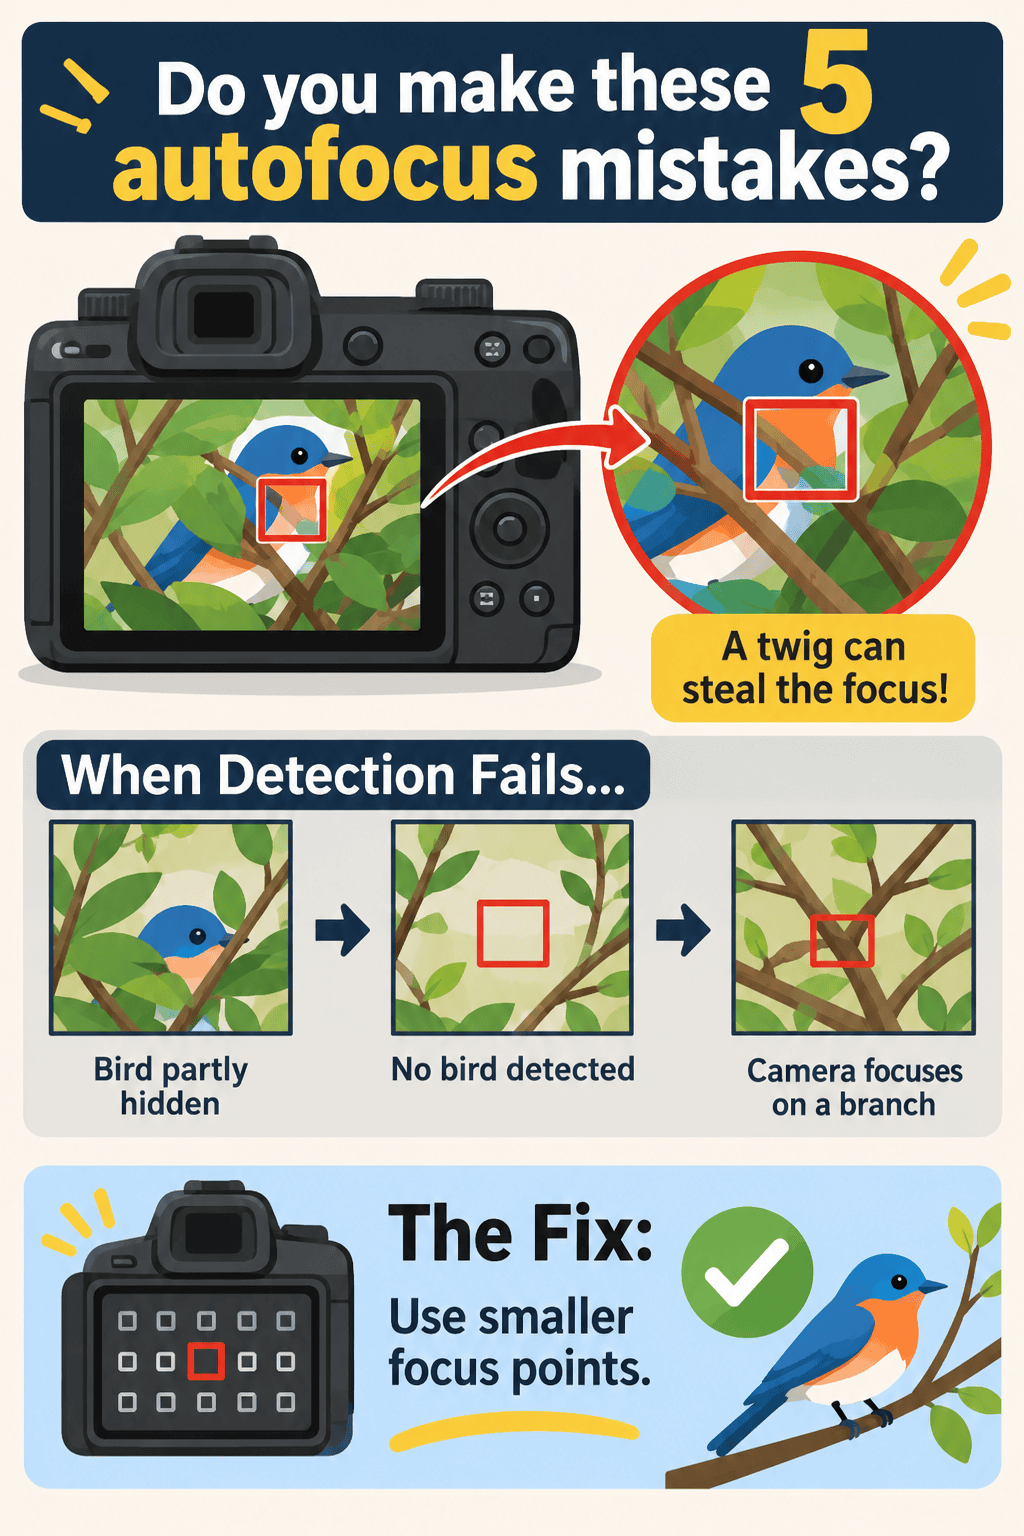
As far as he can tell, the camera runs detection across the whole frame all the time. The AF box you set only tells the camera which of the detected subjects to choose, and if any part of a detected bird sits inside the box, the camera will go for it.
The trouble starts when detection fails to find the bird at all, which happens often when half of it is hidden behind leaves. With nothing detected, the box falls back to focusing on the nearest thing inside it, and in a bush the nearest thing is always a branch.
That is why the classic “camera focuses on branches not bird” complaint gets worse as the box gets bigger, since a large box takes in more twigs and gives the fallback more close objects to grab.
The Nikon Z8 focus manual lists four conditions that can make bird detection miss: the bird’s face is too large or too small in the frame, the light is too bright or too dim, the face is hidden by feathers, or the face and eyes are a similar colour.
It also warns that the camera may draw a box around things that only look like birds.
Its suggested remedy is short and practical, which is to switch to an AF-area mode with smaller focus points. So the company that built the AI is telling you to give it less room in exactly these scenes.
There is one more failure hiding inside the good case, where detection does find the eye, and I will come to it near the end. First, though, the five habits, starting with the one that feeds the fallback more twigs than anything else.
Mistake 1 is leaving the AF area wide in a cluttered scene
Wide and auto area modes are wonderful against open sky, because the bird is the only thing to find. In a hedge, though, they hand the camera dozens of nearer targets and ask it to guess.
Sony’s α7R V focus guide says that for perched birds with many obstacles around them you should use [Spot: M] or [Expand Spot]. Both lock the focus area in place, so the camera can only look where you point it.
I find that reassuring, because shrinking the box can feel like wasting the camera’s newest features. Here the maker itself is telling you the wide tracking default is the wrong tool for branches.
The Z8 shooter I mentioned uses a step-down order that works on most bodies. He starts with a small wide-area box, which still lets detection work but limits how many twigs are in play.
If that still slips, he moves to a 1×1 wide-area box that he saved to the C1 button. It is the size of a single point, and yet it still triggers bird detection, so he gets precision and the eye-finding help together.
His last step is a true single point with detection switched off, which he puts directly on the eye, and I will cover how he reaches it with one button in a later section.
He has a good reason for starting small. Even if detection worked nine times out of ten in a bush, he says going straight to the small box is faster than risking the tenth, because the tenth frame is often the one where the bird turns its head.
Shrinking the box settles where the camera looks, so the next question is how much freedom you give it to decide who the subject is and which part of it counts.
Mistake 2 is letting eye detection choose who and what to focus on
Many bodies ship with subject detection set to Auto, which means the camera first has to work out what kind of subject it is looking at before it starts focusing.
A shooter in an online bird photography group argues that picking Birds directly removes that decision delay and stops the camera from choosing the wrong kind of subject. It takes five seconds to change, so I would do it before your next walk.
Sony goes further with two sub-settings that sit a level deeper in the menu. The first is Recognition Part, which controls what the camera is allowed to treat as the bird.
When a bird’s body is often hidden behind branches, Sony advises setting Recognition Part to [Eye] or [Eye/Head] and leaving body out of it. With body allowed, the camera can lock onto a patch of breast feathers peeking through a gap, and the twig beside that patch is close enough to steal focus.
The second is Tracking Shift Range. When several birds are in view, such as a flock of finches on a feeder, Sony suggests narrowing it to 1 or 2 so the camera stays with your bird and ignores the one that just landed behind it.
Other brands have their own versions of these controls under different names, and it is worth a quiet evening with your manual to find them, because together they shrink the list of things the camera is allowed to call “the bird”.
Once the camera knows what to look for, you still have to decide how hard it should hold on, and that is where one fixed setting causes a lot of trouble.
Mistake 3 is using one tracking sensitivity for every scene
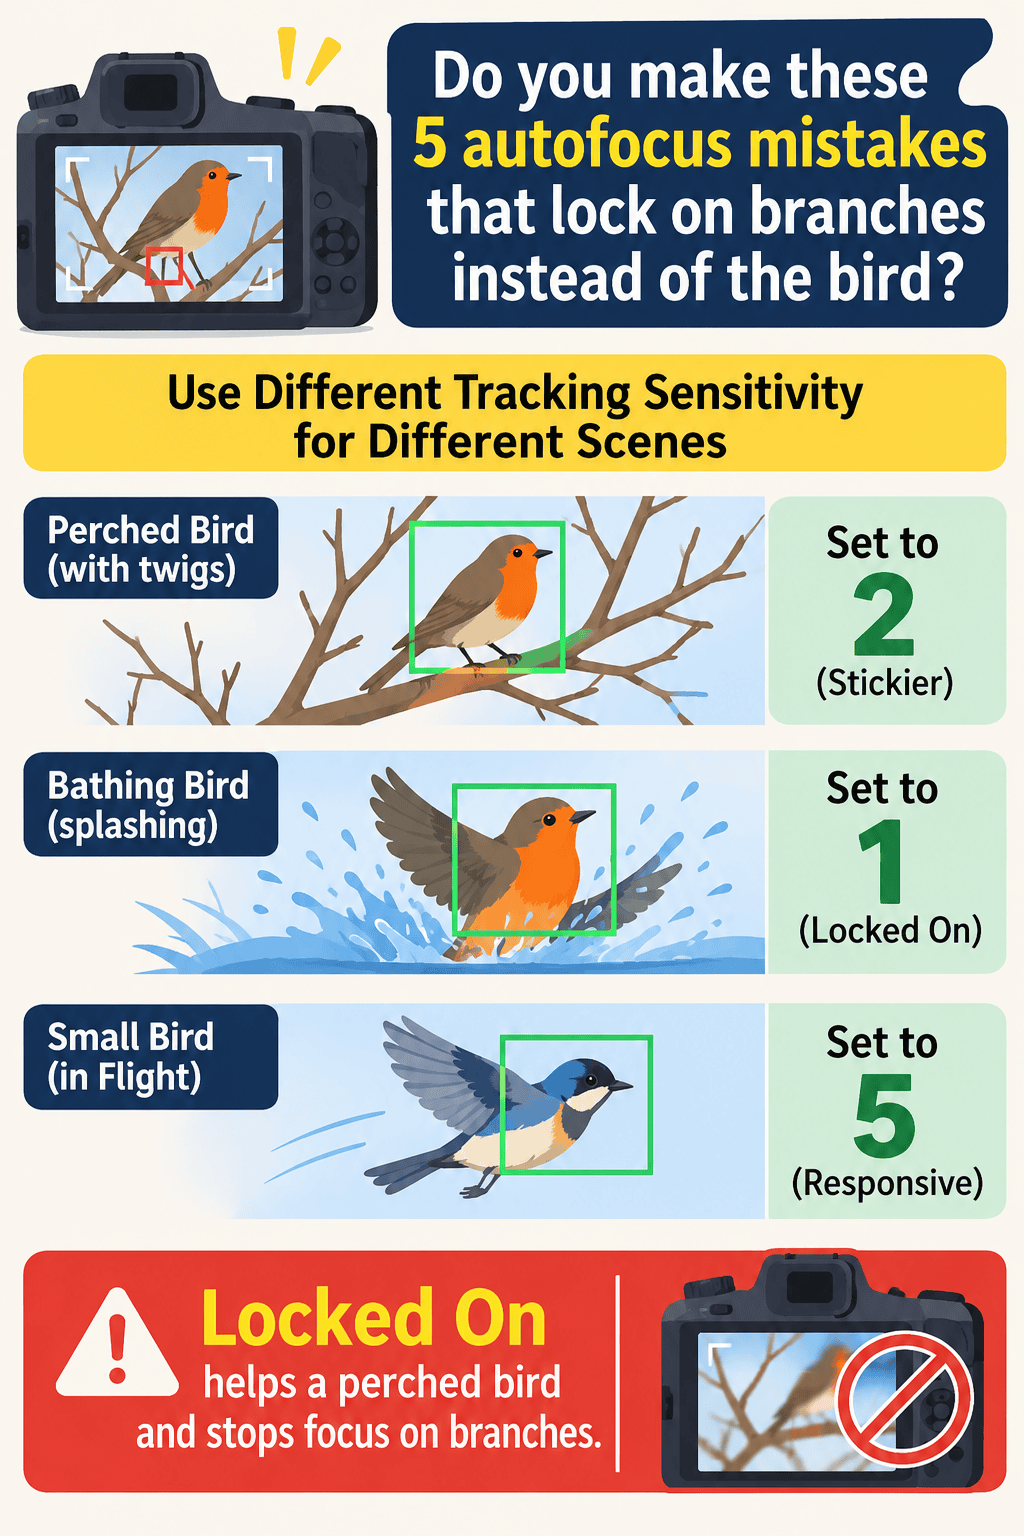
Tracking sensitivity sets how quickly the camera lets go of its current target when something else crosses the box. Low numbers are sticky, so the camera holds on, while high numbers are responsive, so it switches quickly.
Sony’s guide gives different advice for different scenes, and the difference is the useful part. For perched birds with obstacles, it suggests raising stickiness to “2”, and for birds bathing or splashing, it suggests going all the way to “1 (Locked on)” so focus stays off the water and the background.
For small birds in flight or diving, the same guide says the opposite. It suggests “5 (Responsive)” with a Zone or Wide area, because a small fast bird keeps leaving the box and the camera needs to grab it again quickly.
It even says that if the tracking frame lands on the twigs at a bird’s feet as it takes off, switching tracking off may give better focus once the bird is moving.
I doubted that until I watched it happen on a robin leaving a fence post, where the box stayed glued to the post while the bird flew out of frame.
If you often catch birds just as they leave the perch, here’s a camera setup for bird takeoffs you can have ready in advance.
So “Locked on” helps a perched bird behind twigs and slows the camera down with a small bird in flight, which is why leaving one value set for everything costs you frames.
I should be honest that photographers disagree about how much this setting does with detection running. OM-1 Mark II users on a DPReview thread found that negative C-AF sensitivity values are stickier, but some suspect the setting may have no effect on subject detection at all.
They point instead to the Subject Selection “Lock” button as the way to stop focus jumping to a bird that has just appeared. My advice is to test on your own body with a garden feeder before you trust any single dial.
Mike Hagen’s experience with puffins in Iceland shows what a good result looks like even when everything is set well. The birds were flying across sunlit, high-contrast grass, and focus kept jumping to the background.
A group of advanced shooters settled on single-area AF, AF-C, focus tracking delay set to Long, and starting to track while the bird was still far away.
One participant reported that 3D tracking lost the bird just as easily, and even with the best setup they got about one sharp frame in three or four.
That number tells you a keeper rate well under 100 percent is normal in clutter. What you can change is how fast you recover when focus jumps, and that depends on a button you may never have set up.
Mistake 4 is having no escape button for when focus jumps
When AF keeps grabbing foreground branches, the worst thing you can do is take your eye from the viewfinder and dig through a menu, because by the time you are back, the bird has gone.
The fix is a single button that switches the camera into its most precise mode only while you hold it. Every major system can do this, and the setup takes about ten minutes.
Sony
Sony recommends assigning [Track Recog Off on Hold] to a custom key. While you hold it, subject recognition turns off and the area switches to [Spot: M], so you can force focus onto the bird when the camera keeps grabbing something else.
When you let go, the camera goes back to normal tracking. I put it on a key my thumb can reach without moving off the grip.
Nikon
The Z8 shooter programs the movie-record button to switch detection off and give a true single point. His normal setting is a small wide-area box with the 1×1 detecting box on C1, and the movie button sits behind both as the last resort.
The order matters, because each step gives the camera a little less freedom, and you only reach for the next one when the previous one slips.
OM System
The photographers at 2Mad Photographers use all 1,053 AF points with subject detection and C-AF tracking when the background is clean.
When a bird sits in branches or low light, they turn the mode dial to a custom mode with detection and tracking off and the smallest AF point in S-AF.
They say that placing that tiny point on the head focuses faster than the AI does in those scenes. Saving it to the dial makes the switch one movement, and it shows that both setups have their place depending on what is behind the bird.
Canon owners can do something similar by registering a different AF area to a custom button, and the idea is the same on every brand. With the escape button in place, you can turn to two ways of keeping the branches out before focus ever jumps.
Mistake 5 is giving AF the whole distance range and then dropping the lock
Most long lenses have a focus limiter switch on the barrel, and it is one of the most useful branch fixes you have. A Redditor put it simply: if the bird is ten metres away and the twigs are at three, limiting the focus range means the lens can never rack to the twigs.
The 2Mad team keeps the limiter on their 300mm lens set from 4 metres to infinity, because birds rarely come closer than that. The near foreground drops out of the camera’s options entirely, which no menu setting can do as cleanly.
It also makes focusing faster, since the lens has less distance to search. The only cost is the rare bird that lands closer than the limit, and you will notice that quickly because the lens simply refuses to focus.
The second half of this mistake is about your thumb. On Nikon, lock-on only holds while AF stays engaged, so if you release AF-ON and place the area back on the bird, the camera locks again from scratch.
Back-button users note that once a subject is locked, the camera will stay put as long as you keep holding the button. So every time you lift your thumb mid-sequence, you throw away the lock you worked to get and give the branches another chance.
The habit to build is to get focus on the bird and then keep holding through the burst.
Hagen’s puffin group made the same point in a different form, because they started tracking while the bird was still far away and clear of the grass, then rode the lock as it came closer.
Those five changes fix most of the misses, but there is still that leftover case I promised earlier, and it changes when you should trust the camera at all.
When to stop fighting the settings
A bird photographer on Reddit warned about a case that catches even careful shooters. The camera finds the eye correctly, draws its box right on it, and still focuses on a thin branch lying directly in front of that eye.
The box is telling you where the eye is, while the lens focuses on whatever is nearest along that line. This is the purest form of bird eye AF locking on a branch, and no detection setting will save it.
So when there is a twig across the face, zoom in on the back of the camera and check the eye itself.
If it is soft, switch to your single-point escape button or turn the focus ring by hand to pull focus past the twig, which most modern bodies let you do while AF is active.
Sometimes the better move is with your feet. Taking one step to the side often clears the line of sight completely, and waiting for the bird to hop out onto an open perch takes patience but no settings at all.
An experienced Z8 user on the same forum made a point I keep coming back to. He said he probably would skip some of his earlier obstructed cardinal shots today, because a bird behind a screen of branches is often a weak photo even when it is sharp.
He makes exceptions when the foreground frames the bird and shows where it lives, which I think is the right test. If the branches add to the story, work for the shot, and if they just hide the bird, let it go and wait for the next one.
Keep your expectations honest as well. If advanced shooters with good settings got one sharp puffin in three or four frames, then a similar rate from you in a busy hedge means your setup is working.
Next time you head out, try this order: set detection to Birds, start with a small box, put single point with detection off on one button, and slide the limiter to cut out the near distance.
Then hold your thumb down and let the bird come to you, and I think you will see far fewer sharp twigs on the card.
If you’d like a closer look at the gear mentioned in this guide, I’ve linked the three camera bodies and the 300mm lens below. If your camera keeps grabbing branches, try a smaller autofocus area with the gear you already own before deciding whether to upgrade. The links below are affiliate links. As an Amazon Associate I earn from qualifying purchases.

- 45.7MP stacked CMOS sensor and EXPEED 7 processing engine.
- Nikon’s most advanced autofocus system. AF algorithm developed using deep learning technology, detects focus as low as -…
- Internal 8K/60p and 4K/120p video. Internal 12-bit N-RAW and ProRes RAW recording.

- A whole new level of camera intelligence from new AI processing unit
- Next-generation AF with Real-time Recognition autofocus deep learning AI
- 61.0 MP full-frame back-illuminated Exmor R CMOS sensor

- ADVANCED CROSS QUAD PIXEL AUTOFOCUS: Experience exceptional autofocus precision with the 1,053-point Phase Detection Cro…
- 20.4MP STACKED BSI LIVE MOS SENSOR: Capture stunning images with the 20.4MP Stacked BSI Live MOS sensor, engineered to d…
- POWERFUL TRUEPIC X IMAGE PROCESSOR: Powered by the advanced TruePic X image processing engine, the OM-1 Mark II delivers…

- Powerful Telephoto Prime lens
- Weather Sealed Design
- MF Clutch



2 thoughts on “5 Bird Autofocus Mistakes That Leave Branches Sharp and Birds Blurry”