The takeoff is too late to start configuring
You have the perched bird sharp, and then its shoulders lift. Your thumb goes for the focus setting, your finger reaches for the shutter dial, and the bird clears the frame while you are still looking at the camera.
If your bird in flight settings are too slow to change, set up for flight before you reach the trail. Save a setup you can use while the bird is perched, then make tracking part of how you hold the camera. When it launches, you follow with your thumb on AF-ON and your finger on the shutter.
You still have to see the launch and keep the bird in the frame, so the preset needs a little practice. Start with exposure, because a sharp takeoff can still blur at your quiet, perched-bird shutter speed.
Set Your Bird in Flight Settings Before Leaving the Car
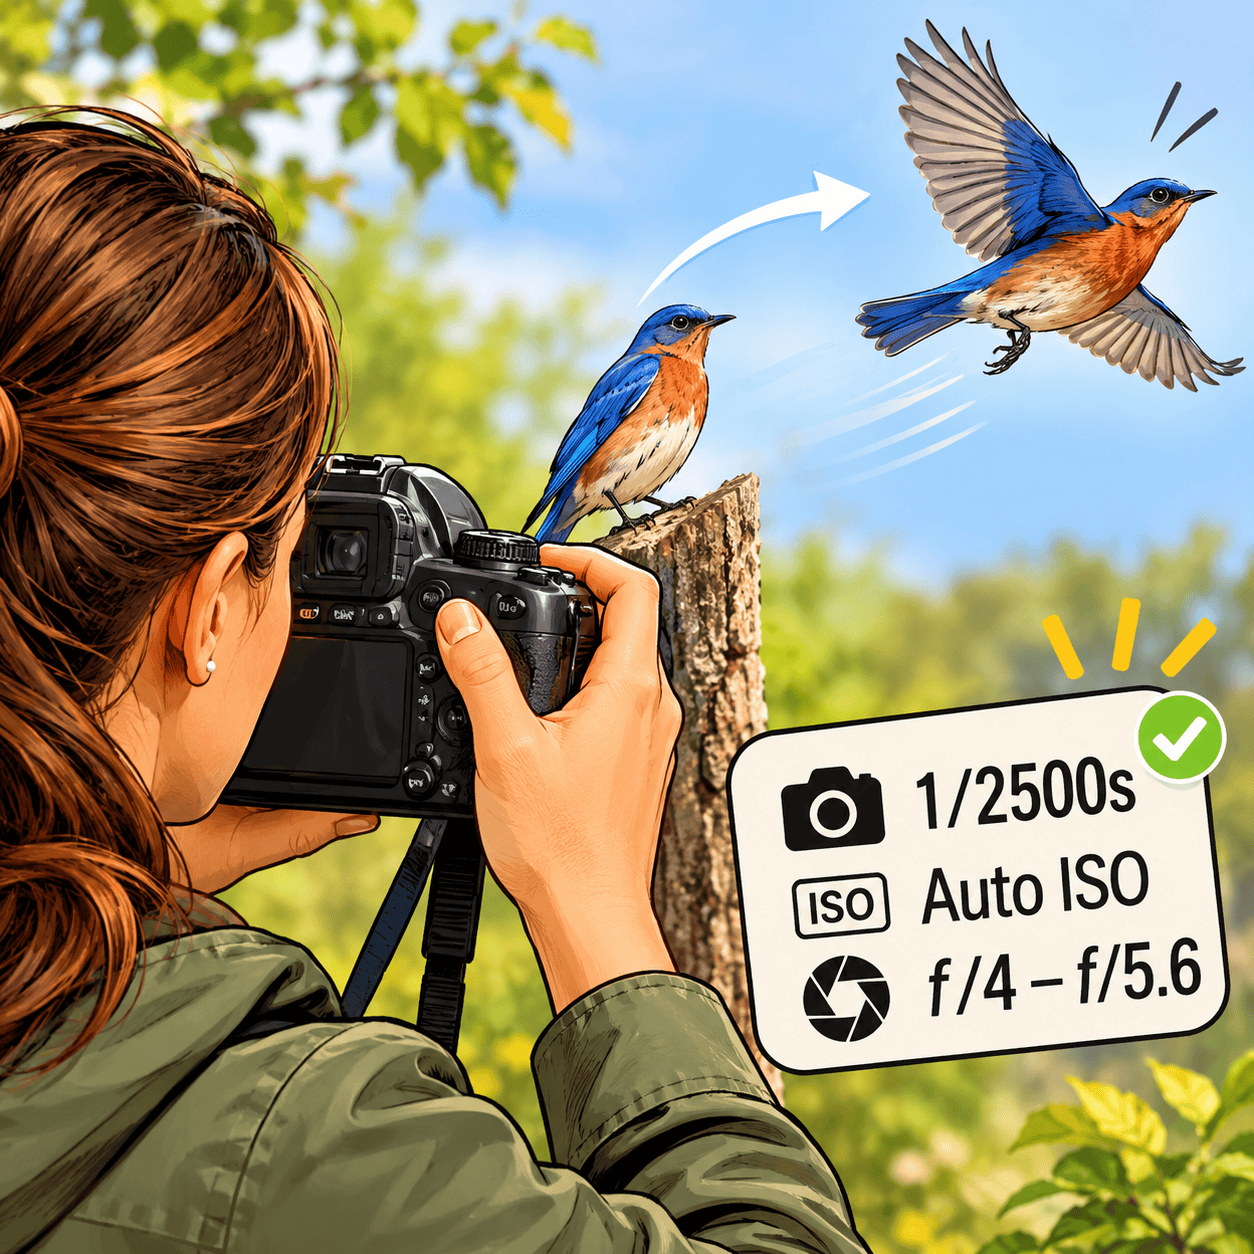
Set manual exposure mode to 1/2500s and turn on Auto ISO. Choose an aperture your lens can use well. For a telephoto lens, that might be f/5.6 or f/8, depending on the lens and how much depth of field you need at your distance from the bird.
Keep the shutter speed fixed so the camera never trades it away when the light drops. These 1/2500 bird in flight settings give you a strong takeoff default.
Photographer Matt Kloskowski uses at least 1/1600s for a large, slower bird and moves toward 1/2500s or 1/3200s for faster action. If your local subjects are quick small birds, or you keep finding soft wing tips, test a faster shutter speed and save it.
Manual mode with Auto ISO needs one point of care: the camera still meters the scene. Shutter speed and aperture stay where you set them, while ISO changes to meet the meter’s reading. Exposure compensation can change that target on cameras that support it in this mode, so check how your body handles the control.
High ISO is often the price of holding a fast shutter in poor light. Nikon photographer Lindsay Silverman made a diving osprey frame in drizzle at 1/2500s, f/9 and ISO 8000. Keep that in mind before setting an ISO ceiling so low that the camera runs out of room when a bird launches under cloud.
Choose the ceiling from files made with your camera, then look at them at the size you actually use. Silverman has described using ISO 6400 as a limit on a Nikon Z8 or Z9 and ISO 12,800 on a Z6III. Your own limit depends on the camera and the light, as well as how much detail you need in the final image.
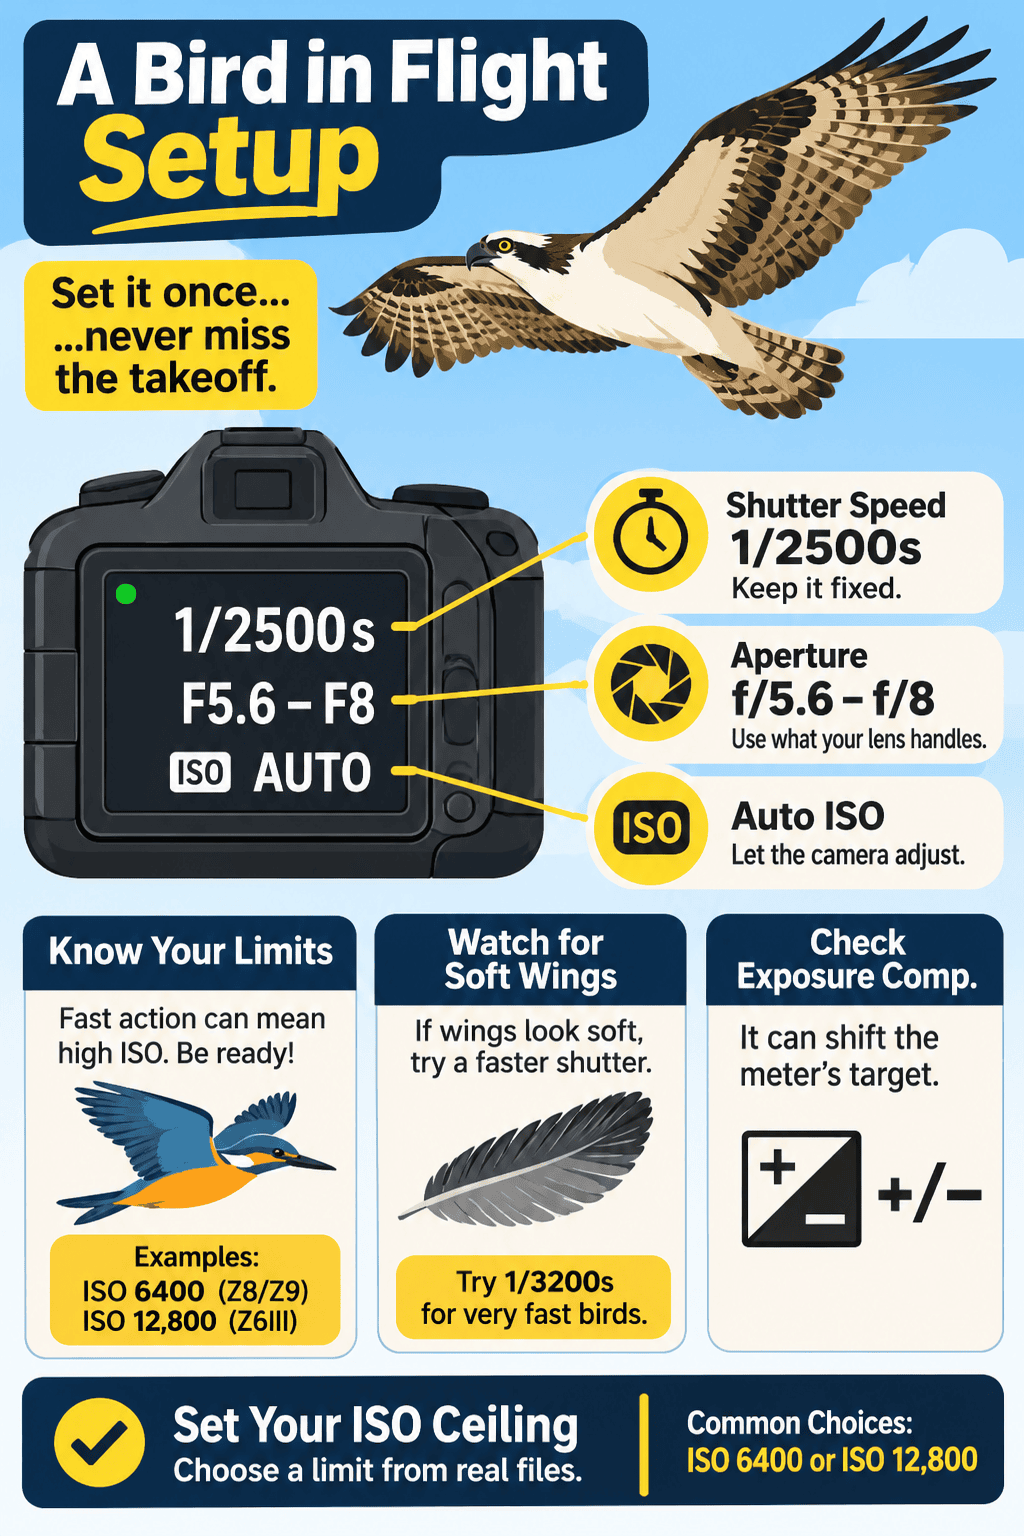
At the upper ISO limit, the camera cannot raise sensitivity further to meet the meter’s target, so your fixed shutter and aperture can produce a dark frame. In very bright light, ISO can hit its lower limit and the frame can become too bright. Check both ends of the range at the car, while you still have time to act. The same preparation helps with getting a sharp coyote photo, where a moving subject can expose problems with shutter speed and technique.
With exposure waiting on the dial, decide where the camera should look when the bird leaves its perch.
Make focus ready while the bird is still perched
Put the flight mode in continuous AF, and enable bird subject detection if your camera offers it and you have found it reliable. Begin tracking while the bird is on the branch. A perched bird may turn its head or lean forward, giving the camera a chance to stay with it before launch.
Silverman uses continuous AF even on perched birds. He has chosen a fairly large focus area for a perched plover because he expected it to fly. Leave the bird enough space to move across the area during your first attempt to follow.
How much space you need depends on what surrounds the perch. Against clean sky, a wide tracking area gives you room to pick up an erratic bird. Beside reeds or crossing branches, a smaller zone placed over the bird gives the camera fewer tempting targets. Kloskowski makes that same distinction between open sky and scenes with competing detail.
If the bird is still tucked behind twigs, here’s what to do when autofocus grabs the branches.
Bird detection does not always search the whole frame regardless of your chosen area. On the OM-1, photographer Michael Guthmann uses the size and position of the AF field to tell the camera which bird to follow when several are present. Test your body with two birds, or two clear subjects at different points in the frame, and watch what it selects.
A wide area also changes your job with the viewfinder. If the bird leaves your frame at full zoom, the camera has nothing useful to track. Try acquiring a flying subject with some space around it, then tighten your framing once you can follow its path.
For a bird deep in branches, keep a tighter AF area ready and plan to hold it on the head as the bird moves. Save the area that suits the takeoffs you see most often. You can change it for a dense perch when you have time, but the saved choice should already work at your usual spot. For help finding places to practise, your local bird club can point you toward hawks and other raptors.
Save it, then rehearse the one move
Store the exposure and focus setup in a dedicated custom mode. Save the drive setting you use for a short burst, along with the AF area you chose for your common takeoff background. Then turn the dial away, turn it back and check what actually returned. Custom modes vary by camera, and some button choices live elsewhere in the menus.
Guthmann keeps a bird setup in an OM-1 custom mode so he can recall it with the mode dial. He uses shutter priority for exposure. Your saved mode can hold manual exposure with Auto ISO if you want to set both shutter speed and aperture yourself.
Set AF-ON to start focus and tracking. If you want back-button focus to work on its own, remove AF activation from the shutter button. Confirm both actions with the camera to your eye. With continuous AF active, holding AF-ON keeps the camera updating focus, while releasing it stops that update.
Rehearse the hand movement while the bird is still perched. Track it with your thumb on AF-ON and leave a little room in the frame. Keep the button down as the bird launches, follow through with the lens and press the shutter for a burst.
Your thumb needs to stay down after the first frame. If you let go of AF-ON while firing, focus can stay at its last distance as the bird flies away or toward you. Practise on birds already in flight, or on a moving subject near home, until holding the button through the burst feels normal.
You may prefer shutter-button AF, especially if your grip makes AF-ON hard to hold while panning. Keep it if you can track more steadily that way. What matters is that you can keep focus active through the whole pass without reaching for a setting.
Once the mode is saved, give it a short test in the light you are about to walk into.
Run a ten-second check before walking
At the car, turn to the custom mode and read the display. Look for 1/2500s and your chosen aperture, then confirm Auto ISO is on. Point toward a bright patch and then into shade, and watch whether ISO moves. If the meter calls for more than your ceiling allows, the shaded takeoff may be dark.
Check the bright end too. If ISO is already at its minimum and the exposure display warns of a bright frame, raise shutter speed or choose a narrower aperture while you have time. A shutter faster than 1/2500s may suit the action well. A smaller aperture costs light, so check what happens when you point back into shade.
Press AF-ON on a clear subject and see whether tracking starts. Move the AF area across a nearby branch to learn how eagerly it leaves the subject. Then tap the shutter and make sure it behaves as you intended after separating focus from release.
Return to your saved mode if the test led you to change anything. That last turn of the dial is easy to skip, and the preset only helps when the camera is using it. For batteries, memory cards, protection, and carrying equipment, review the outdoor photography gear checklist.
Before leaving Auto ISO on for the whole session, look at the light falling on the bird. A changing background can affect the meter even when that light stays steady.
Know when Auto ISO is the wrong automation
Auto ISO earns its place when the light falling on the bird changes. A bird moving from an open, sunlit bank into shade needs a new exposure, and Auto ISO can make that change while you keep your shutter speed ready for flight.
Now think about a bird flying in the same sunlight above dark trees and then across a bright sky. The light on its feathers may barely change, while the camera’s meter sees two very different backgrounds. Auto ISO can shift because of the background and give you an uneven run of frames.
Wildlife photographer Tom Bol uses Auto ISO for changing subject light and switches to a fixed ISO when the subject stays in steady light against changing backgrounds. You can make the same choice by metering the bird in the light it will keep, setting an ISO that exposes it well and leaving shutter speed and aperture fixed through the pass.
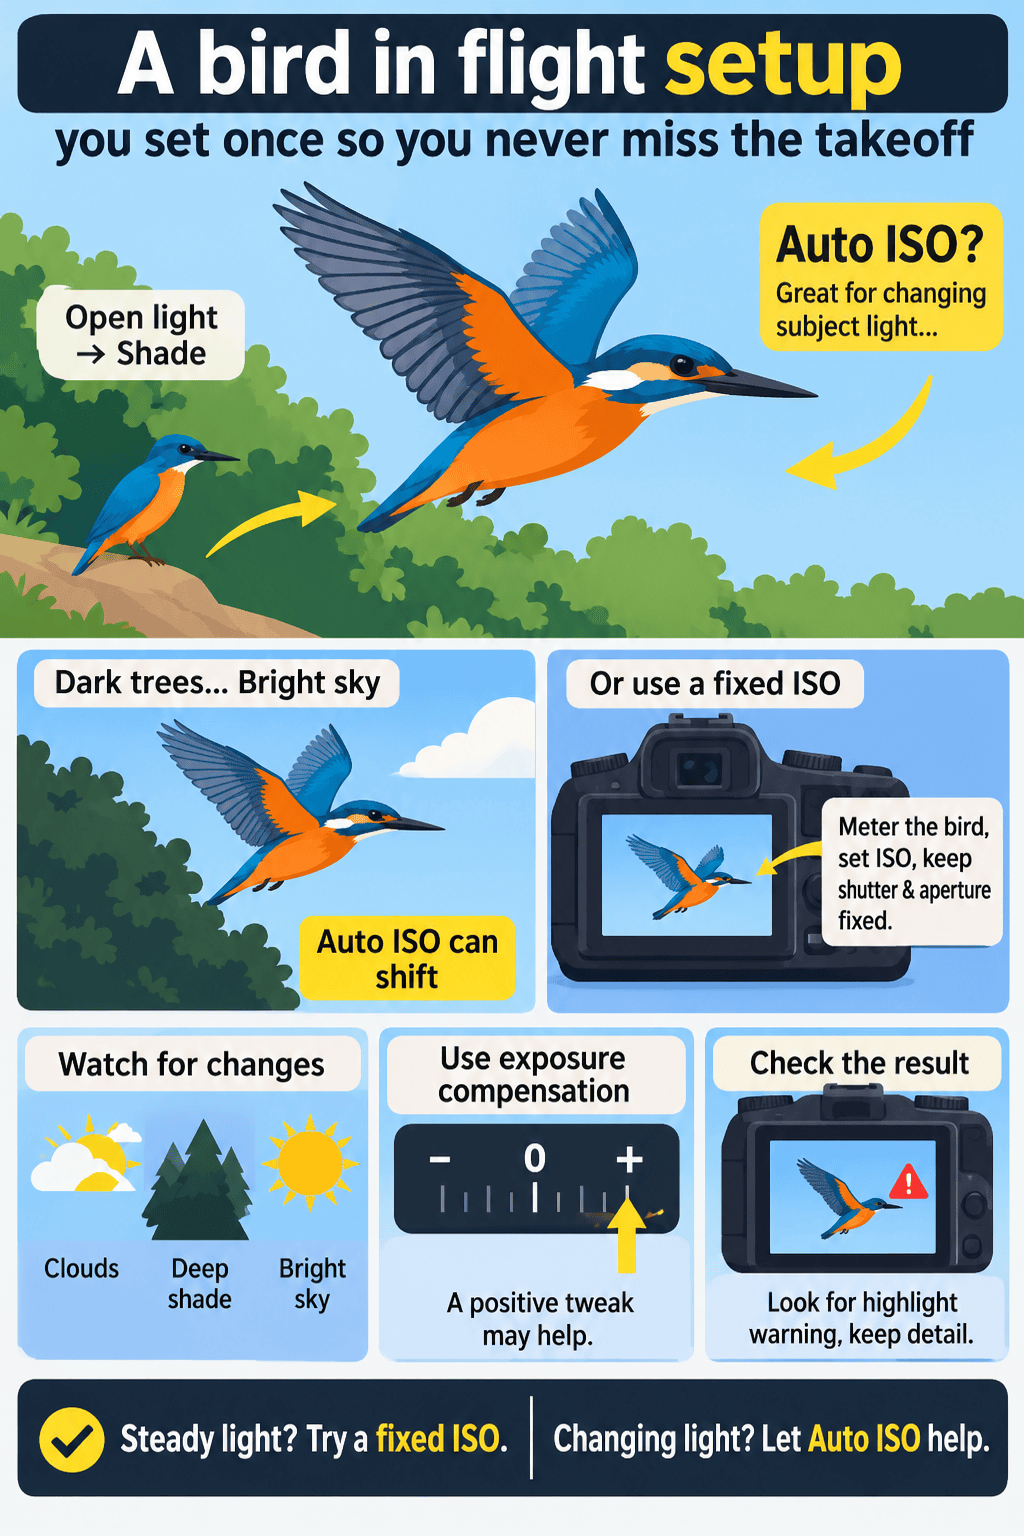
That choice takes a quick look at the actual light on the bird. A cloud crossing the sun can change the exposure you need, as can a flight path into deep shade. If either is likely, Auto ISO gives you more room to keep shooting while the light shifts.
Exposure compensation is another control to prepare when you keep Auto ISO on. A bird against bright sky may need a positive adjustment so it does not go too dark, depending on how your camera meters the scene. Check a frame and its highlight warning, then save or remember the adjustment that suits that light. Keep an eye on pale feathers, because lifting exposure can cost you detail there.
Steady light on the bird favors a fixed ISO, while changing light favors Auto ISO. Make the choice before raising the camera, then put your attention back on the perch. The remaining delay is the one between seeing the launch and pressing the shutter.
What the preset still cannot do
A bird can launch between the moment you notice movement and the moment your finger presses the shutter. The preset gives your reaction a better chance by removing the settings change. Your first frame still depends on when you press the button.
If your camera has a pre-capture feature, learn its limits and try it for predictable perches. On Guthmann’s OM-1, ProCapture can buffer frames before the shutter is fully pressed, which can save a takeoff that beats your reaction by a fraction of a second. Battery use and buffer behavior depend on the camera. Test the way you trigger the feature before a long wait in the field.
Framing remains the harder part for many takeoffs. If you fill the viewfinder with a perched bird at the longest end of your zoom, one quick hop can send it out of sight. Back off enough to give yourself space in its likely direction of travel, and keep both eyes open if that helps you find it after the launch.
The direction matters as much as the space. A bird facing into wind may leave the perch toward the open side of the frame, though any bird can change its mind. Watch its posture, place it with room ahead and begin holding AF-ON while you can still see its eye clearly.
If you find yourself thinking, “The bird takes off before I can adjust my camera,” save the flight mode and check it before the walk. Start tracking while the bird is perched. You may still miss an early wingbeat, but your hands will be free to follow the bird.